
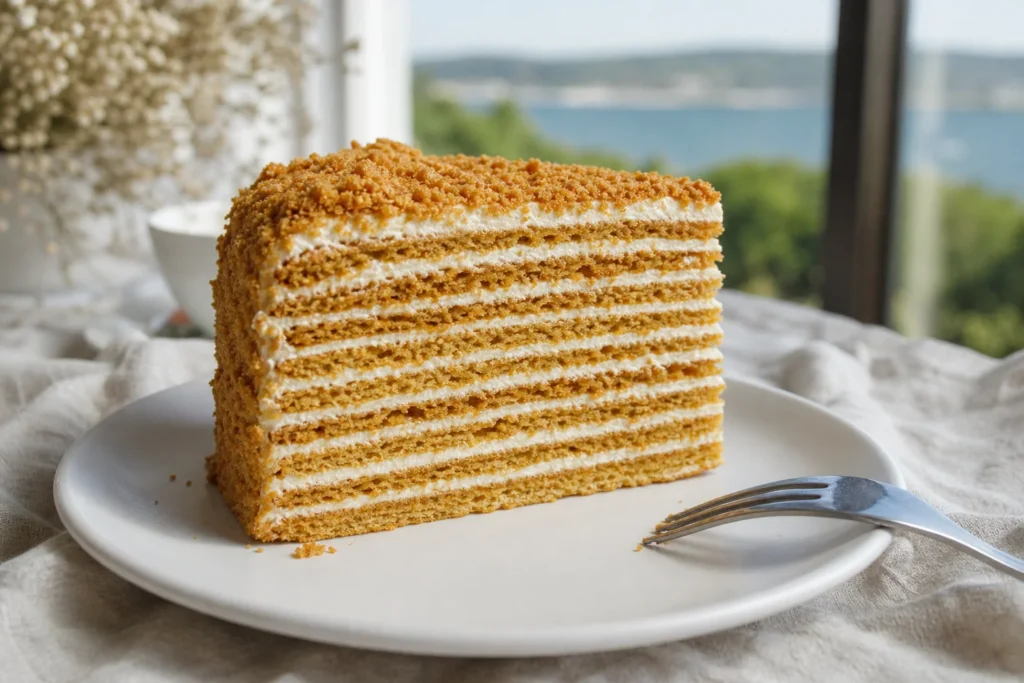
Medovik is a layered honey cake from Russian and post-Soviet cuisine, beloved across Yekaterinburg and the wider region. If you want to learn how to make medovik at home, expect to invest time in rolling thin layers, but the result is a show-stopping dessert that tastes even better the next day.
The recommended approach is the traditional method: prepare honey-sweetened dough, divide it into layers, bake them separately, then assemble with sour cream frosting and refrigerate overnight. This guide walks you through each step so you understand what to expect.
Quick answer: Mix honey, butter, sugar and eggs, add baking soda and flour to form dough, divide into 8–10 portions, roll and bake each layer thin until golden, cool, then assemble with a sour cream frosting and refrigerate overnight for the layers to soften. Total time: 2–3 hours active preparation plus overnight chilling.
At a Glance
| Type | Desserts & sweets |
|---|---|
| Local name | Медовик |
| Origin | Medovik is a layer cake popular in countries of the former Soviet Union. It became everyone's favorite dessert in the 20th century during the Soviet period. A popular legend attributes its creation to an imperial chef in the 19th century, but there are no historical sources to confirm this story, and it is historically inaccurate to assume that the kitchen staff were not familiar with the royal family's food preferences; the story of it being "Elizabeth's favorite cake" is false. |
| Servings | 8–10 people |
| Total time | 2–3 hours active; overnight chilling |
| Difficulty | Medium |
History and Story of Medovik, Yekaterinburg
Medovik is popular in countries of the former Soviet Union. While a legend claims a 19th-century imperial chef created it for Empress Elizabeth Alexeievna, this story is disputed by historians. Medovik was not documented in Russian historical cookbooks until the 20th century and became everyone’s favorite dessert during the Soviet period. It was first included as an official recipe in cookbooks in the 1960s in the book “Ukrainian Dishes” published in Kyiv, and was popularized by Ukrainian cuisine expert Darya Tsvek.
Ingredients
- 100 g butter
- 150 g sugar
- 3 large eggs
- 3 tablespoons honey
- 400 g all-purpose flour
- 1 teaspoon baking soda
- 800 g sour cream
- 300 g powdered sugar
How Medovik, Yekaterinburg Is Made
Step 1: Prepare the dough
Heat honey, butter, and sugar in a saucepan over low heat, stirring until smooth (about 5 minutes). Remove from heat and let cool slightly so it's warm but not hot. Add baking soda—the mixture will bubble and lighten. Beat eggs separately, then whisk them in gradually while stirring constantly. Add salt and vanilla extract. Fold in sifted flour until you have a soft, slightly sticky dough. Do not overmix.
Tip: If the mixture is too hot when you add eggs, they will scramble. The dough should feel soft and pliable, not stiff.
Step 2: Rest and divide the dough
Wrap the warm dough in plastic or cover it, and let it rest for 30 minutes at room temperature or in the refrigerator. This allows the dough to firm up slightly and become easier to work with. Divide the dough into 8–10 equal portions using a kitchen scale for accuracy.
Tip: Equal portions help the layers bake evenly. Even small variations in thickness won't harm the final cake.
Step 3: Roll and cut the layers
Preheat the oven to 350°F (180°C). Place each dough portion on parchment paper and roll it very thin—2–3 mm is ideal. Use a cake ring, plate, or round cutter (about 8 inches or 20 cm in diameter) to cut a circle. Prick each layer lightly with a fork to prevent excessive puffing.
Tip: Rolling thin layers is the key to authentic medovik texture. Work one layer at a time and slide the parchment directly onto the baking sheet.
Step 4: Bake the layers
Bake each layer for 3–4 minutes until golden brown. The layers should be crispy when hot but will soften later as they absorb cream. Transfer to a wire rack to cool completely. Save all the trimmed dough scraps—you'll crush them into crumbs to coat the outside of the finished cake.
Tip: If your oven has space, bake 2–3 layers at once to speed up the process. Just watch carefully to ensure even browning.
Step 5: Prepare the sour cream frosting
In one bowl, whip the heavy cream to stiff peaks. In another, whisk sour cream, powdered sugar, and vanilla extract until smooth. Gently fold the whipped cream into the sour cream mixture until fully incorporated. The frosting should be light and fluffy. Use full-fat sour cream; low-fat versions result in a runny frosting.
Tip: Make the frosting just before assembly so the whipped cream stays firm. Keep it chilled until you're ready to layer the cake.
Step 6: Assemble the cake
Place a dab of frosting on a serving plate to anchor the first layer. Lay down one honey layer and spread a generous amount of frosting over it. Top with another layer and repeat until all layers are stacked. Cover the top and sides with the remaining frosting, smoothing it with a spatula. Crush the reserved baked trimming scraps into fine crumbs and coat the sides and top generously.
Tip: Place parchment strips around the base before assembling to keep the platter clean. Remove them once the frosting sets.
Step 7: Chill overnight
Refrigerate the assembled cake for at least 8 hours, ideally overnight. This allows the sour cream frosting to hydrate the honey layers, softening them from crispy to tender. The cake will taste noticeably better and have a uniform, melt-in-your-mouth texture after a full night of rest.
Tip: Store in the refrigerator. The cake is good after 8 hours but reaches its best texture and flavor after 24 hours.
Variants
- With condensed milk frosting instead of sour cream
- With added nuts (walnuts or hazelnuts) in the frosting
- With cinnamon or cardamom spice in the dough
- With chocolate or cocoa powder in some layers
- With orange zest in the frosting
- With dried fruit or prunes mixed into the frosting
Common Mistakes to Avoid
- Rolling layers too thick: Medovik is defined by its thin, delicate layers. Layers thicker than 3 mm will remain too crispy even after chilling; aim for transparent when you hold them up to light.
- Using low-fat sour cream: The frosting must be made with full-fat sour cream (at least 20–25% fat) to hold structure. Low-fat versions will be too runny and won't set properly.
- Assembling while frosting is still warm: Warm frosting will not set. Chill the frosting and make sure all baked layers are completely cool before assembly, or they will soften unevenly.
- Skipping the overnight rest: The cake's signature texture comes from the layers absorbing moisture overnight. Eating it the same day means the layers stay crispy and the cake is much less impressive.
- Adding frosting too early: Do not make the frosting more than 1–2 hours before assembly, or the whipped cream will deflate and the frosting will become too thin to coat the cake properly.
- Rushing the egg incorporation: Add beaten eggs slowly while stirring constantly. If added too quickly or if the honey mixture is too hot, the eggs will cook and create a lumpy, grainy dough.
How to Order and Eat It
The cake’s defining characteristics—thin, honey-infused layers alternated with rich, tangy sour cream frosting—create a unique texture that softens over time as the layers absorb moisture, transforming into a tender, melt-in-your-mouth delicacy. Serve cold or at room temperature. Cut with a warm, wet knife for clean slices. The cake is often enjoyed with hot tea or coffee, and keeps well in the refrigerator for 3–4 days.
To order: Медовик, пожалуйста [Medovik, pozhaluysta]
Diet and Allergens
- Contains eggs
- Contains dairy (sour cream, butter)
- Contains gluten
- Typically contains honey
Russia Vibes Tips
- A slice often includes a generous layer of cake crumbs on the sides—these come from trimmed scraps of baked dough and are an essential decoration, not a messy accident. Save every scrap.
- The texture improves dramatically with time. A cake made on Friday and served on Saturday night will taste noticeably better than one served the same day.
- You can bake the honey layers 1–2 days in advance and store them in an airtight container. Assemble and frost just 24 hours before serving.
- If your frosting looks too thin or watery, drain the sour cream through cheesecloth for 1–2 hours before whipping to remove excess liquid.
- Don't fear imperfect layers. Slight variation in thickness and irregular shapes matter far less than proper resting; the final cake will look impressive regardless.
Explore Nearby Medovik, Yekaterinburg
Related guides
 Local Food & Market Walk, Yekaterinburg: Central Market, Pelmeni and Street Eats
Main image: AI-generated illustration. It may not show the place exactly as it looks.
 Iset River Embankment & Plotinka Walk: Yekaterinburg’s Historic Heart
Main image: AI-generated illustration. It may not show the place exactly as it looks.
Browse more: All Food & Drink · All Food & Drink in Yekaterinburg · All Other · All Yekaterinburg
FAQ
Why does medovik need to rest overnight?
Resting allows cream to hydrate the honey layers, creating the soft texture medovik is known for. The crispy baked layers absorb moisture from the frosting and gradually soften into a tender, almost custard-like consistency. The flavor also deepens as ingredients meld.
Can I freeze medovik?
It is best not to freeze the finished cake, but you can freeze the plain honey layers for up to one to two months. The frosting and assembled cake do not freeze well due to the moisture content.
What's the difference between medovik and other honey cakes?
Medovik is the Russian one; the Czech version is called medovnik. They are close cousins, and versions exist across Eastern Europe, from medivnyk in Ukraine to miodownik in Poland.
Why do some recipes use condensed milk instead of sour cream?
The identifying ingredients are honey and smetana (sour cream) or condensed milk. Both are authentic. Sour cream frosting is more traditional and tangy; condensed milk frosting is sweeter and smoother. Choose based on your taste preference.
How many layers should medovik have?
Medovik typically has 8–10 layers, but this can vary. More layers make a more impressive presentation but take longer to prepare. The quality of each layer matters more than the exact number.
Can I make medovik in a cake ring or mold?
Yes. Place the ring on a cake board lined with acetate. Layer the honey rounds inside, alternating with frosting. This creates a uniform cylinder shape. Remove the ring and acetate after the cake has chilled thoroughly.
What if my frosting is too runny?
That's normal for a classic medovik—the thin cream soaks into the layers overnight and makes the cake soft. For a thicker frosting, drain the sour cream in cheesecloth for a few hours, or fold in some whipped cream.
Is it ever served in restaurants or bakeries in Russia?
Medovik is traditionally homemade. While some Russian restaurants and bakeries offer commercial versions, it is most cherished as a family dessert prepared from scratch, and recipes are often passed down through generations.
Russia Vibes is a one-person project. A coffee keeps it going
How we research and update our guides
About this guide: AI assistance and accuracy
This guide is created with the help of AI and is based on official sources where available. Mistakes can still happen. Opening hours, prices, rules and other details are given to the best of our knowledge as of the date shown and can change without notice. It offers general recommendations only, not professional, legal or travel advice. Please confirm important details with the official source before you travel; you are responsible for your own plans and decisions.

Take this guide with you
Get a free PDF of this guide to print or read offline: key facts, tips and a map link on a few clean pages.
Report an issue on this page
Paying for your trip: please read
International sanctions affect payments between Russia and many other countries. In practice, cards issued in the EU, the UK, the US and several other countries often do not work in Russia, Russian cards usually do not work abroad, and some booking platforms, airlines and payment providers limit or suspend their services for Russia. The situation changes frequently.
We do not give legal or financial advice, and this site does not encourage anyone to break or circumvent sanctions. Whatever you plan, you are responsible for following the laws and regulations that apply to you, including those of your country of residence and citizenship.
Many travelers still organise their stay lawfully. It is worth asking your bank or payment provider what is currently permitted, contacting hotels, tour operators and carriers directly about the payment methods they accept, and checking which services are open to customers from your country. Clarify payment, cancellation and refund terms before you commit to a booking, and keep your plans flexible.
Partner links on this site may not be available in every country, and prices, availability and rules in our guides can differ from what you see when you book.