
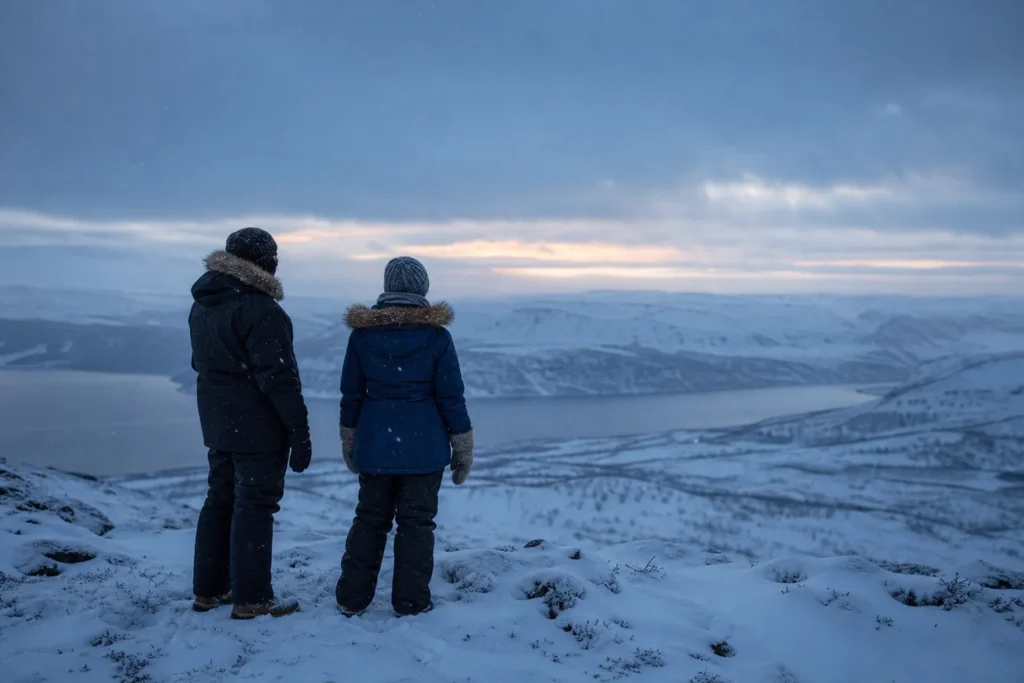
Murmansk presents a paradox for arctic visitors: despite sitting north of the Arctic Circle, it experiences relatively mild winters due to the warming influence of the North Atlantic Current. Yet the weather remains genuinely cold and demanding. Pack for Arctic weather in Murmansk by layering strategically, protecting your extremities, and preparing for wind that can make mild temperatures feel dangerously cold.
This guide covers what to bring for winter visits (September to March), when you’ll face polar nights, frequent snow, and a real risk of frostbite if unprepared. The emphasis is on smart layers, moisture management, and Arctic-quality gear rather than bulk.
Quick answer: Layer your clothing in three systems: thermal base layers (merino wool or synthetic), fleece or wool mid-layers, and a windproof, waterproof outer shell. Add insulated mittens over liner gloves, a wool hat, scarf, thick socks, and waterproof boots with substantial soles. Total time to assemble a proper packing list: 2–3 weeks before travel. Cost: ₽₽ to ₽₽₽ depending on whether you already own quality outdoor gear.
At a Glance
| Total time | 2–3 weeks advance planning; 1–2 hours to gather and test gear before departure |
|---|---|
| Typical cost | ₽₽–₽₽₽ |
What You Need Before You Start
- Thermal base layer set (at least two)
- Fleece jacket or wool sweater
- Windproof, waterproof outer jacket and trousers
- Insulated mittens and thin liner gloves
- Wool hat covering ears
- Wool scarf or neck gaiter
- Thick wool socks (at least three pairs)
- Waterproof boots with insulated lining and substantial sole
Compare Your Options
| Option | Duration | Price | Notes |
|---|---|---|---|
| Full layering system with Arctic-quality gear (recommended) | Prepare 2–3 weeks before travel | ₽₽–₽₽₽ | Buy or borrow purpose-made Arctic gear: merino wool base layers, fleece mid-layers, Gore-Tex outer shell, insulated boots. This setup works for temperatures from -5°C to -30°C. Most effective for anyone planning outdoor activities like aurora viewing or snowmobile tours. |
| Mixed approach: rent a jacket and boots locally, bring your own layers | 1–2 weeks planning; arrange rentals 1 week ahead | ₽₽ | Some Murmansk tour operators rent expedition parkas and insulated boots on arrival. Bring your own base layers, socks, and accessories. Saves luggage space if you don't own quality outdoor gear. Less control over fit; rentals may not fit perfectly over your layers. |
| Intensive shopping in Moscow or St Petersburg before Murmansk | 1–2 days shopping before flying to Murmansk | ₽₽–₽₽₽ | If you arrive in Russia without Arctic gear, department stores in major cities stock thermal wear and fleece. Murmansk's local shops also sell basics but have limited selection. Prices are higher than online purchases made in advance. Useful only if you forgot items. |
| Budget approach: layering ordinary winter clothes | Immediate; use what you have | ₽ | If you already own a warm winter coat, thermal shirts, and insulated boots from a colder home region, you may layer them. Risk: ordinary winter gear lacks wind and water resistance needed for Murmansk's conditions. NOT recommended for extended outdoor time; suitable only if your stay is mostly indoors and transit-based. |
₽ budget · ₽₽ moderate · ₽₽₽ upscale · ₽₽₽₽ splurge. Price levels are estimates compared with typical prices for visitors.
Step-by-Step Instructions
Step 1: Choose merino wool or synthetic base layers
Start with thermal underwear—both top and bottom. Merino wool is excellent because it retains warmth even if damp and resists odor. Synthetic polypropylene works well too. Avoid cotton entirely; it absorbs moisture and loses insulating power when wet. Look for snug fit without restriction. You need at least two complete sets so you can wear one while the other dries.
Tip: Merino wool blends are more durable and easier to care for than pure merino.
Step 2: Add mid-layers for warmth without bulk
Bring 3–4 mid-layer pieces: two fleece jackets (one medium-weight for everyday wear, one lighter for active movement), and 2–3 wool sweaters or turtlenecks in varying weights. These trap air and create insulation. Fleece is synthetic but excellent for Arctic conditions—it insulates when damp and dries quickly. Layer these items loosely over your base layer to allow air circulation.
Tip: Pack at least one heavyweight sweater for extreme-cold days; lighter layers give you flexibility.
Step 3: Select a windproof, waterproof outer shell jacket
Your outermost layer must block wind and shed snow. Look for a hooded expedition jacket (Gore-Tex or equivalent) that extends to your hips and has sealed seams. The jacket should feel roomy enough to fit mid-layers underneath without squeezing. The hood must cover your head completely and stay secured even in gusts. Many Arctic-specific jackets include pit zips for ventilation during active movement.
Tip: Try the jacket on over your full layered outfit before buying to ensure fit and mobility.
Step 4: Pack waterproof trousers separate from your jacket
Waterproof ski pants or expedition trousers are essential. They must be loose enough to fit over your thermal leggings and regular trousers without compression (tight clothing restricts blood flow and makes feet colder). They should reach your ankles and have reinforced areas over the calves where snow packs against your legs. Sealed seams are crucial.
Tip: Loop straps inside the trousers hold them in place over your boots and prevent snow from climbing up your legs.
Step 5: Choose gloves in two layers: liner and insulated mittens
Wear two pairs: thin liner gloves (polypropylene or silk) underneath, and thick insulated mittens on top. This lets you remove the mittens to handle a camera, phone, or door handle without exposing bare hands. Mittens keep your whole hand warm; individual fingers in gloves lose more heat. Look for waterproof mittens with wrist cuffs that extend 10–15 cm up your arm.
Tip: Attach mittens to your jacket with a cord so you don't lose them when you remove them.
Step 6: Get a wool hat, scarf, and neck gaiter
You lose significant heat through your head. Pack a wool or fleece beanie that covers your ears completely and sits low over your forehead. Add a wool scarf or neck warmer to cover the gap between your jacket collar and hat. A balaclava (ski mask) is useful for windy days when you're outside for extended periods. These items are lightweight and compressible.
Tip: A balaclava with eyeholes lets you move between extremely cold outdoor conditions and warmer indoors without removing your face protection.
Step 7: Pack multiple pairs of thick wool socks and insulated boots
Bring at least four pairs of thick wool or merino socks. Many visitors wear two pairs at once—a thinner inner pair and a thicker outer pair—to ensure insulation without restricting blood flow. Never wear tight socks; constriction causes cold feet. Your boots must have insulated lining (at least 200g of Thinsulate or equivalent), a waterproof exterior, and a substantial sole at least 1 cm thick. The sole protects against cold conducting up from the ground.
Tip: Try boots on in the afternoon when your feet are slightly swollen to ensure proper fit; boots that are too tight reduce circulation.
Step 8: Add sunscreen and lip protection
Arctic snow reflects intense sunlight, especially in spring months. Pack sunscreen with SPF 50+, a lip balm with SPF, and consider zinc oxide for extra face protection. Bring a small jar of moisturizing cream to apply before bed; the extreme cold and low humidity dry skin rapidly. These items are small but make a real difference in comfort.
Tip: Apply sunscreen in layers; reapply every 2 hours if you're outside during daylight.
Step 9: Prepare for frostbite risk awareness
Wind chill is the real danger. Temperatures near -10°C (14°F) can feel like -25°C (-13°F) or colder in strong wind. Exposed skin on your face, particularly cheeks and nose, can develop frostbite in 15–30 minutes in extreme conditions. Always cover exposed skin. If you feel numbness or a stinging sensation in extremities, move indoors immediately and gradually warm the affected area.
Tip: Check weather forecasts and wind predictions before heading outside; sometimes guides cancel tours if wind chill reaches dangerous levels.
Step 10: Pack a second complete layer set for backup
Wet gear doesn't dry quickly in Arctic conditions. If you get caught in heavy snow or if an insulated piece gets damp, you need a complete backup outfit. Pack a spare thermal set, an extra sweater, and backup mittens in your carry-on luggage. This prevents a single mishap (falling in snow, sweating through layers) from ruining your trip.
Tip: Use vacuum seal bags to compress clean backup layers and save luggage space.
Common Mistakes to Avoid
- Wearing cotton instead of wool or synthetic: Cotton absorbs moisture, loses all insulating power when wet, and takes hours to dry. Once damp, cotton pulls heat away from your body. Even if you feel dry, internal moisture reduces warmth by 50%. Always choose merino wool, polypropylene, or other synthetics for every layer touching your skin.
- Ignoring wind chill forecasts: A -10°C day with 20 km/h winds feels like -25°C. Many visitors check temperature but ignore wind speed, then get surprised by how cold it actually feels. Check wind forecasts before going outside; guides sometimes cancel aurora tours if wind chill becomes dangerous. Wear your full outer shell even on days that don't seem that cold.
- Wearing tight boots or socks: Constriction cuts off blood flow to your toes and feet, causing them to go numb and cold even with insulation. Never buy boots that are snug; they should fit with enough room for two pairs of socks and feel slightly loose. This seems counterintuitive but is essential for Arctic conditions.
- Forgetting a scarf or neck warmer: The small gap between your jacket collar and hat is where cold air leaks in directly to your neck. This single gap can chill your entire body if you're outside for hours. A scarf or neck gaiter costs almost nothing and makes an enormous difference.
- Packing everything in checked luggage: If your main suitcase is delayed, you arrive in Murmansk without warm gear. Always pack base layers, an extra sweater, insulated mittens, a hat, and socks in your carry-on so you have backup clothing even if your checked bags don't arrive.
- Underestimating the need for sun protection: Arctic snow reflects up to 80% of UV rays, intensifying sun exposure. Even on overcast days, reflected light can cause severe sunburn. Apply SPF 50+ sunscreen every 2 hours and use lip balm with SPF. Your face is the most vulnerable area.
- Forgetting to acclimatize layer changes gradually: If you move directly from a warm hotel to extreme cold, your body shocks. Step outside for 5–10 minutes first, then adjust layers. Don't rush; give your circulation time to adapt. This prevents dizziness and reduces the risk of cold-related illness.
Tickets, Payment and Booking
Arctic-quality gear is not sold in standard shops, so plan to buy or rent before arriving in Murmansk. Most international airports have outdoor gear shops (for example, in Moscow’s Sheremetyevo or Saint Petersburg‘s Pulkovo), but prices are high. Better options:
- Buy online before travel: Order from outdoor retailers in your home country 2–3 weeks before departure. Merino wool base layers, fleece, Gore-Tex jackets and trousers are available from global brands. International shipping to Russia may be limited due to sanctions on some Western brands; check local availability of your chosen brand.
- Local rental: Murmansk hotels and tour operators rent expedition parkas (₽) and insulated boots (₽) on arrival. Arrange this 1 week ahead. Rental quality varies; confirm sizing before committing to multi-day tours.
- Moscow or Saint Petersburg shopping: Department stores (GUM, TSUM) and sports shops stock thermal wear and fleece. Prices are higher than online. Useful if you arrive unprepared, but time is short before flying to Murmansk.
- Payment methods: Russian shops and rental services accept Russian bank cards (Mir, Sberbank) and cash in rubles. Foreign visitors should check whether their credit card works in Russia and whether sanctions affect international payment processing; this varies by your home country’s regulations. Some tour operators may accept international cards through payment processors, but reliability varies.
Russia Vibes Tips
- Layer loosely, not tightly: Air pockets between layers create insulation. Tight layers compress the fabric and destroy the insulating effect. Wear each layer loose enough that you can fit a hand between your shirt and sweater. This seems bulky but is how Arctic gear works.
- Check weather forecasts hour by hour before going outside: Wind, cloud cover, and temperature can change dramatically. Aurora hunting requires clear skies, which might be available only at certain times. Weather forecasts for Murmansk update frequently; check them within 2 hours of heading out to choose your timing and gear intensity.
- Acclimatize to temperature changes slowly: Moving from a heated hotel (22°C) directly to -15°C shocks your system. Step outside for 5 minutes first, then gradually expose more of your face and hands. This prevents dizziness, reduces frostbite risk, and helps your body regulate cold exposure.
- Keep backup dry clothes in your hotel room: If you get wet during an outdoor activity, change immediately and hang wet gear to dry. Never stay in damp clothing; it drains body heat rapidly. Your hotel should have a radiator or heater where you can dry things overnight.
- Mitts over gloves is non-negotiable: This seems obvious but many people don't do it. Mittens keep your whole hand warm; individual-finger gloves lose heat from each finger. Remove mittens only when you need dexterity (camera, door). This small discipline prevents severe cold hands.
- Stay hydrated and eat enough calories: Cold weather increases your calorie burn and dehydration risk (dry air pulls moisture from your body). Eat regular meals and bring snacks on long outdoor activities. Dehydration makes frostbite and hypothermia more likely. Drink water even though you don't feel thirsty.
Explore Nearby Pack for Arctic Weather in Murmansk
Browse more: All How-To · All How-To in Murmansk · All Murmansk · All Other
FAQ
Is Murmansk really that cold? Do I really need all this gear?
Murmansk averages around -10°C in winter, which is mild compared to inland Siberia. However, wind chill and extended darkness create real danger. Wind can make -10°C feel like -25°C. Frostbite develops in 15–30 minutes in such conditions. Yes, full Arctic layering is necessary if you plan outdoor activities like aurora viewing or snowmobile tours. If you stay mostly indoors, you can get away with less, but this defeats the point of visiting Murmansk.
Can I use regular winter clothes from home instead of Arctic gear?
Regular winter coats and boots work for urban winters in cold climates (e.g., Toronto, Moscow) but not for Murmansk. Standard winter gear lacks the waterproofing, windproofing, and insulation needed. Arctic conditions are extreme. If your home winter temperature never drops below -5°C, your gear won't be adequate for Murmansk. You'll get cold and possibly develop frostbite. Invest in proper Arctic gear.
How much luggage space do I need for all these clothes?
What if I get too hot while wearing all these layers?
You might feel warm initially, especially during active movement like snowmobiling. The layering system is designed so you can shed outer layers (mittens, jacket) or unzip zips to ventilate. Never remove your thermal base layer or mid-layer fleece outside. Take breaks indoors to cool down. In hotels and restaurants, you'll remove the outer shell and mittens. The system allows adjustment without compromising protection.
Are there laundry services in Murmansk if I need to wash clothes during my stay?
Most hotels offer laundry service, though turnaround is 1–2 days. Some hostels have self-service laundry machines. If you're staying longer than 3 days, plan to wash items. Thermal base layers and socks should be washed every 2–3 days. Fleece can dry quickly and go longer. This is why packing two complete thermal sets is important—you can wear one while the other washes.
Do I need to buy expensive brand-name Arctic gear like Patagonia or Arc'teryx?
Not necessarily. Function matters more than brand. Look for gear with these features: base layers in merino or polypropylene; mid-layers in fleece or wool; outer shell with Gore-Tex or equivalent waterproof-breathable membrane; sealed seams; hood on jacket. Many brands sell this at lower prices. In Russia, brands like Nordica and local athletic companies offer adequate gear at lower cost than Western premium brands. Test fit and waterproofing rather than chasing brand names.
Can I see the Northern Lights without spending all day outdoors in the cold?
Aurora tours typically last 3–5 hours at night, often in stationary locations or during slow movement. You'll be outside in full cold. Yes, you need full Arctic gear for this. Some tours use heated vehicles or cabins for breaks. If you cannot tolerate extended cold exposure, consider visiting Murmansk in summer (June–August) for other activities, or take very short outdoor walks during your winter visit and skip aurora hunting.
What if I have an allergy to wool? Can I use only synthetic layers?
Yes. Polypropylene, polyester, and other synthetics are excellent alternatives to merino wool. Fleece jackets are 100% synthetic. Modern synthetic base layers wick moisture and dry quickly. The only difference is that synthetics can retain odor more than wool, so wash them more frequently. Thermal underwear in polypropylene works just as well for warmth. Beanies and scarves in fleece or acrylic are fully synthetic alternatives to wool.
Russia Vibes is a one-person project. A coffee keeps it going
How we research and update our guides
About this guide: AI assistance and accuracy
This guide is created with the help of AI and is based on official sources where available. Mistakes can still happen. Opening hours, prices, rules and other details are given to the best of our knowledge as of the date shown and can change without notice. It offers general recommendations only, not professional, legal or travel advice. Please confirm important details with the official source before you travel; you are responsible for your own plans and decisions.

Take this guide with you
Get a free PDF of this guide to print or read offline: key facts, tips and a map link on a few clean pages.
Report an issue on this page
Paying for your trip: please read
International sanctions affect payments between Russia and many other countries. In practice, cards issued in the EU, the UK, the US and several other countries often do not work in Russia, Russian cards usually do not work abroad, and some booking platforms, airlines and payment providers limit or suspend their services for Russia. The situation changes frequently.
We do not give legal or financial advice, and this site does not encourage anyone to break or circumvent sanctions. Whatever you plan, you are responsible for following the laws and regulations that apply to you, including those of your country of residence and citizenship.
Many travelers still organise their stay lawfully. It is worth asking your bank or payment provider what is currently permitted, contacting hotels, tour operators and carriers directly about the payment methods they accept, and checking which services are open to customers from your country. Clarify payment, cancellation and refund terms before you commit to a booking, and keep your plans flexible.
Partner links on this site may not be available in every country, and prices, availability and rules in our guides can differ from what you see when you book.